1. Installation
1.1. System requirements
| Component | Minimum | Recommended |
|---|---|---|
Processor |
Dual core with 2 GHz or faster |
Quad core with 2 GHz or faster |
RAM |
2 GB |
4 GB |
Storage |
40 GB |
>= 80 GB |
This Sponsoring Portal requires MPP >= 5.4.2 or Macman >= 2.6.9.
1.2. Install Ubuntu 16.04 LTS
Download the latest Ubuntu Server 16.04 LTS. Boot your server or virtual machine from the CD.
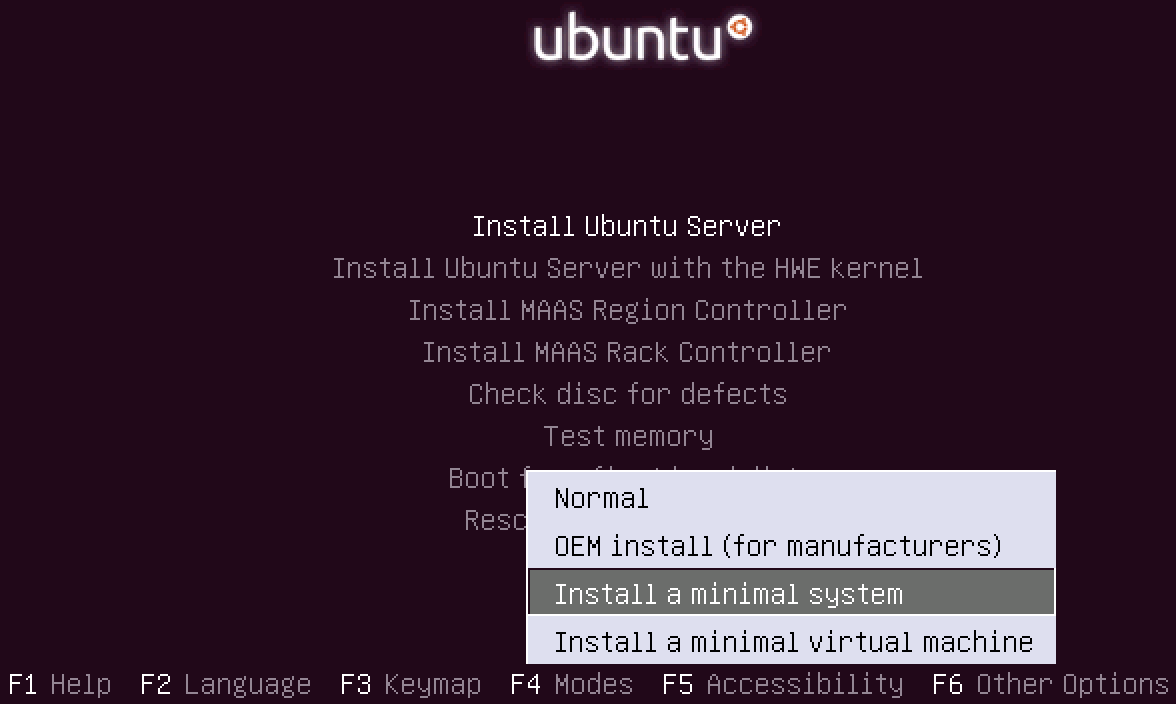
On the boot screen press F4 and choose Install a minimal system. Make sure that Install Ubuntu Server is selected an press enter to start the installation. During the installation select the parameters that best fits your installation.
We suggest to install the software standard system utilities and OpenSSH server through the installation.
| If you install the Sponsoring Portal as a virtual machine, we recommend to select Guided - use entire disk as partitioning method. Guided - use entire disk and set up LVM is a good fit for bare metal installations. |
After you have completed the installation and the system has been rebooted, you can login with the credentials defined during the previous basic installation.
1.2.1. Configure Package Sources
sudo -i (1)

apt-key adv --keyserver hkp://keyserver.ubuntu.com:80 --recv-keys F369C4E68772878E (2)

apt update (3)
apt install apt-transport-https (4)

cat <<EOF >/etc/apt/sources.list (5)
deb https://system:********@packages.cloudguard.ch/system/ xenial main
deb https://sp:********@packages.cloudguard.ch/sp-v2/ xenial main
EOF

apt update (6)| 1 | Gain root privileges |
| 2 | Add GPG key of CloudGuard Software AG |
| 3 | Update local package repository |
| 4 | Install HTTPS support for APT |
| 5 | Configure APT source list |
| 6 | Update local package repository after APT has been reconfigured |
1.2.2. Finishing OS installation
apt update
apt full-upgrade (1)
shutdown -r now (2)| 1 | Perform a full system upgrade |
| 2 | Reboot system |
Don’t forget to install the package open-vm-tools by issuing the command apt install open-vm-tools as
root, if you run the server as a virtual machine.
|
1.3. Sponsoring Portal
apt install sponsoring-portalThe sponsoring-portal package installs and configures all software it requires. Once the installation has completed, you need to finish the Nginx configuration.
1.3.1. Configure Reverse Proxy (Nginx)
With the default configuration the reverse proxy uses the self-signed certificates of the base system. In order to use
your own certificates you have to put the certificate key into the directory /etc/ssl/private/ and the certificate
combined with the intermediate certificate into the directory /etc/ssl/certs/. After that, edit the Nginx configuration
file /etc/nginx/sites-available/sponsoring-portal and set the value of the properties ssl_certificate_key and
ssl_certificate to match your setup.
To put the certificate with the intermediate within one file you can simply call
cat cert.crt intermediate.crt > cert-chain.crt on the CLI.
|
If the fully qualified domain name of the system does not match the URL pointing to the Sponsoring Portal, you have to modify the server_name property as well.
Check Nginx’s configuration with nginx -t and restart the Linux Daemon if everything is ok by issuing
systemctl restart nginx.
1.4. Access the Web Console
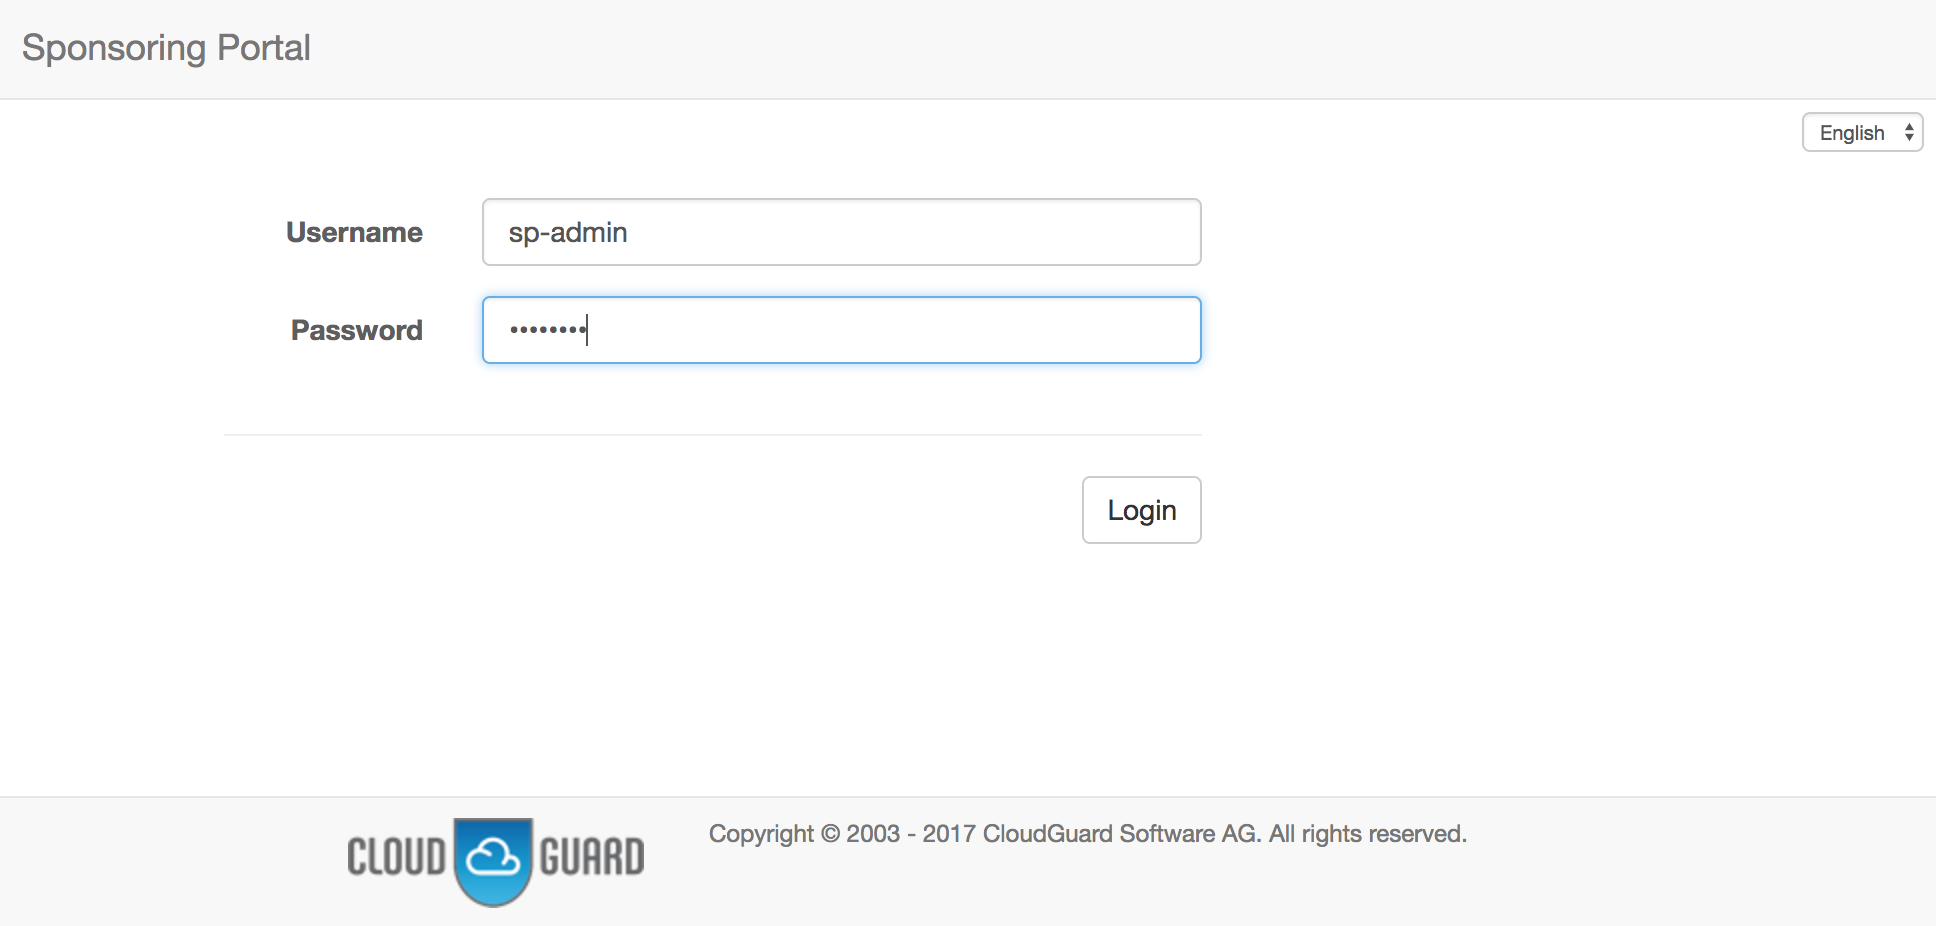
If nothing went wrong, you should now be able to access the web console by https://<server_name>/. Use sp-admin as username and password to login as administrator. This user has been created automatically during the package’s installation process.
2. Administration
Only users with the role Admin, such as the default user sp-admin are allowed to configure the Sponsoring Portal.
2.1. Certificates
All certificates are handled by the external Java trust store. Therefore you must import any SSL certificate that is in place in your environment like MPP, Macman or external User Directory.
2.1.1. How to import a certificate into the Java trust store
In order to verify a remote peer the Sponsoring Portal has to be able to verify the remote host’s certificate. Either you have the certificate already or you have to fetch it from the server.
remote_host=ldap.exmaple.com
remote_port=636
openssl s_client -servername ${remote_host} -host ${remote_host} -port ${remote_port} < /dev/null 2>/dev/null | sed -n '/^-----BEGIN CERTIFICATE-----$/,/^-----END CERTIFICATE-----$/p' > ${remote_host}.crtremote_host=ldap.exmaple.com
keytool -import -file ${remote_host}.crt -alias ${remote_host} -keystore /usr/lib/sponsoring-portal/truststore.jks
The default password of the trust store is password.
|
2.1.2. Configure the Sponsoring Portal to use the local trust store
Open the configuration file /usr/lib/sponsoring-portal/sponsoring-portal.conf and extend the JAVA_OPTS as follows:
JAVA_OPTS="-Djavax.net.ssl.trustStore=/usr/lib/sponsoring-portal/truststore.jks"After the configuration change has been fulfilled do not forget to restart the Sponsoring Portal systemctl restart sponsoring-portal.
2.2. Organizational Unit
An organizational unit (shortened to org unit) is defined with a name and an optional comment. Multiple organizational units can be structured as parent-child relations.
2.2.1. Configure Organizational Unit
The behavior of an org unit (and its children) is configured through its Permissions & Settings view.
Permissions & Settings
New permissions & settings of an org unit are applied to a particular Group. Such a group must be configured beforehand. The Org Unit - Group relation owns the permissions & settings.
Permissions & settings are applied to these general types of entities:
-
Guest User (MPP user)
-
MPP Device
-
MPP Voucher
-
Macman User
-
Macman Device
Permissions are read, create, edit and delete, while settings are entity type specific. Both permissons & settings are inherited within org units.
Any configuration issue is shown either as an error or as a warning. Errors indicate a configuration issue which must be corrected by the administrator of the Sponsoring Portal.
The optional field Delete After relates to an Input Template field. If it is defined here, make sure is is visible or enabled on the input template, and vice versa.
Guest User
Guest user specific settings are applied here.
User groups are retrieved from MPP MPP Configuration. These settings need to be configured, and are used to create a guest user.
MPP Device
MPP device specific settings are applied here.
User groups are retrieved from MPP MPP Configuration. These settings need to be configured, and are used to create a MPP device.
MPP Voucher
MPP voucher specific settings are applied here.
Voucher groups are retrieved from MPP MPP Configuration. These settings need to be configured, and are used to create a MPP voucher.
Macman User
Macman user specific settings are applied here.
Device groups are retrieved from Macman through Macman Configuration. These settings need to be configured, and are used to create a Macman user.
Macman Device
Macman device specific settings are applied here.
Device type, device groups and organizational units are retrieved from Macman through Macman Configuration. These settings need to be configured, and are used to create a Macman device.
2.3. Group
A group is a container. It is used for Organizational Unit - Group relation, and to limit My Device approval.
Any synchronized user of a User Directory can be assigned to a group. This helps to easily identify remote users on the Sponsoring Portal.
2.3.1. Configure Group
A group has a unique name, an optional comment, and a max. my devices field. It specifies how much devices a user can approve.
2.4. User Account
User accounts are either created locally, or synchronized from a user directory.
If a user account belongs to the Local Directory, it can be assigned to zero, one or more Groups.
If a user account is synchronized from a LDAP Directory, the user is assigned to a standard group. The standard group is configured in the User Directory general administration.
2.5. User Directory
Two types of user directories can be configured:
-
Local Database
-
LDAP Directory
You can manage the users locally on the Sponsoring Portal or connect it to several LDAP directories including Microsoft’s Active Directory. The user chooses the directory on the login page.
2.5.1. LDAP Directory
Four sections of a LDAP directory can be configured:
-
General
-
Connection
-
User account LDAP attributes
-
Group LDAP attributes
General
A remote user is assigned to a local Standard Group, if it is synchronized. A standard group is like any other Group, with this exception: a synchronized User Account can not unmap itself from the standard group. The LDAP directory is the authority of this user account, and the standard group defines the mapping to the Sponsoring Portal.
A standard group can be remapped to another group, nevertheless.
To remove all users from a directory on the Sponsoring Portal, the standard group can be set to (None).
Connection
This section defines basic connection settings and some synchronization related configuration options.
The LDAP time limit in seconds defines how long one request can go. Synchronization of a large directory uses multiple requests.
The LDAP count limit of 0 means that all entries are synchronized. This should be the default. For a general connection test run, the value can be set to i.e. 10, to limit the amount of transferred entries.
The LDAP sync intervall in minutes defines how often the whole(!) data is transferred from the directory to the Sponsoring Portal for synchronization.
The LDAP page size specifies the batch size of one result, which is transferred from the directory to the Sponsoring Portal.
Active Directory Attribute Mapping
| Field | Attribute |
|---|---|
User account ID attribute |
|
Display name attribute |
|
First name attribute |
|
Last name attribute |
|
Username attribute |
|
User group attribute |
|
Email attribute |
|
Phone number attribute |
|
User object class |
|
| Field | Attribute |
|---|---|
Unique group id attribute |
|
Display name attribute |
|
Group description attribute |
|
Group member attribute |
|
Group member of attribute |
|
Group object class |
|
Synchronization
| Sponsoring Portal synchronization goes one way, from remote to local. The remote directory is the authority of the data, and the Sponsoring Portal consumes the data. |
LDAP directory synchronization is done on configuration Save, is triggered automatically, or can be activated by pressing the Synchronize button.
Directory Service Groups
All available Directory Service Groups are shown here. It is possible to assign a directory service group to one or more local Groups.
A remote group is assigned to a Local Group, if it is synchronized. All users within the remote group are assigned to this local group. Like with the standard group, a synchronized User Account can not unmap itself from such a group. The LDAP directory is the authority, and the local group defines the mapping to the Sponsoring Portal.
Local groups are optional. If none is chosen, just the standard group is used.
2.6. MPP Configuration
2.6.1. Guest User Template Settings
2.7. Macman Configuration
2.8. My Device Configuration
2.9. Custom Fields
Custom fields can be defined to enhance Input Templates with additional input fields.
A custom field consists of a unique name and has a type. Based on the type, additional fields such as values or regular expression can be defined.
The following types are available:
-
List: defines a list with values; a value can be selected
-
Text: any text is possible, supports a regular expression to validate the text
-
Yes/No: offers a simple yes-or-no checkbox
An ID is assigned to a custom field, if it is added to the Sponsoring Portal. The ID can be used to identify a custom field from the MPP configuration, for TXT or PDF export.
2.10. Input Template
An input template can be defined to configure which fields are visible on an input form. In addition, static or generated values can be assigned to an input field of a template. The purpose is to simplify and automate user input. The user requires less time to fill out the form. Some input templates can be enhanced with Custom Fields.
Input templates exist for the following forms:
-
New Guest User (supports custom fields)
-
New MPP Device (supports custom fields)
-
New MPP Voucher
-
New Macman User (supports custom fields)
-
New Macman Device (supports custom fields)
2.10.1. Configure Input Template
An input template has a unique name, an optional comment, and a priority. It is referenced from the Permissions & Settings of an Organizational Unit.
| The input template with the highest permission is presented to a Guest User, if he is member of multiple groups. |
A collection of field settings define how the input template looks and behaves. Each field is defined with a field name, if it is visible, if a value provider is enabled, and with a default value.
| Visible | Enabled | Value | Result |
|---|---|---|---|
True |
True |
A value must be configured |
Field is visible and has read-only value |
True |
False |
Value is ignored |
Field is visible and uses user-input |
False |
True |
A value must be configured |
Field is invisible and has value |
False |
False |
No value |
This combination is not allowed for mandatory fields! |
Two types of value providers do exist:
-
Static value. A default value is defined in the input template and is applied to the form; example: Valid For 1440 minutes, Enabled: true
-
Generated value. A value generator produces a value for the form; example: Valid From First Login, Voucher Code: 5313
Some value providers, such as the username-, password- or vouchercode-provider require additional configuration.
The MPP Device field MAC Addresses can’t be modified. It is shown for completeness.
The field Delete After (not available in MPP Voucher) needs to be visible or enabled if it is configured within Permissions & Settings. Adding this field to an input template without setting the permissions & settings doesn’t have any effect.
Custom Fields
Some input templates can be extended with Custom Fields. A custom field of an input template supports the same configuration options. An additional optional field can be configured. It specifies if the field requires an input value or not.
3. Guest User
Manage user accounts on the MPP, in order to grant network access to guests.
4. MPP Device
Manage user devices on the MPP, in order to grant headless or special devices network access.
A MPP device is related to an Organizational Unit. Given the user has the required Permissions & Settings, two options to manage MPP devices are provided here.
-
To fill out the input form
-
To use the CSV Import / Export tool
The first option is interactive and can add / delete one device, while the second option offers bulk actions.
5. Macman User
Manage user accounts on the Macman, in order to grant network access with WPA2 encryption into a dedicated network (VLAN, …).
6. Macman Device
Manage user accounts on the Macman, in order to grant network access with Layer 2 filtering.
A Macman device is related to an Organizational Unit and to a Macman Device Type setting. The device type defines which MAC addresses of a device are available. Given the user has the required Permissions & Settings, two options to manage Macman devices are provided here.
-
To fill out the input form
-
To use the CSV Import / Export tool
The first option is interactive and can add / delete one device, while the second option offers bulk actions.
7. My Device
Connect personal devices to the corporate network by using WPA2 encryption, in order to use this device at work.
8. CSV Import / Export
The tool can add or delete a number of entities to the Sponsoring Portal at once. The input data is a comma (,) or semicolon (;) separated file, encoded with UTF-8 or ISO-8859-1, also called Latin 1. Former Microsoft Excel versions use this encoding, typically, when exporting to a CSV file.
8.1. Import Guest Users / MPP Devices / Macman Users / Macman Devices
Importing a CSV file is done in three steps:
-
Uploading the file by choosing the file, encoding and separator
-
Mapping the column fields
-
Executing the import
8.1.1. CSV Field Mapping
First of all, it must be defined on which column the import shall start.
Then, each column of the CSV file must be mapped to a field name of the Sponsoring Portal. This is done in the Column-Field Name Mapping table. If a field is provided by an Input Template, its value is mapped automatically. If the first line of the file contains the known field names, the Sponsoring Portal does the initial mapping automatically.
The first few lines of the uploaded file are shown in a Preview below, to support the mapping decision.
| It is not needed to map all fields to delete entities. An information box shows which fields are required. |
| For Macman devices, it is not possible to map MAC addresses to particular device slots. MAC addresses are mapped to slots in ascending slot number order. |
8.1.2. Import
If the mapping is set, the uploaded file is imported by clicking Add or Delete. Based on the number of lines that are imported, it might take some time. The Sponsoring Portal connects to remote systems such as MPP or Macman, and does several validation checks to assure data integrity over all involved systems.
A success message is shown at the end, if no errors are detected.
| Updated entries are just counted for MPP and Macman Devices with multiple MAC addresses. A device is updated if some (not all) MAC addresses were deleted. |
8.1.3. Errors
If errors occur, a Summary page with Failed Lines appears. The summary shows deleted, updated and failed entries. Failed lines can be downloaded (as CSV), for correction. The error causes are added in a separate column. The whole import process can start over with the corrected CSV file.
8.2. Export
The entities of an organizational unit can be exported as CSV. The encoding is chosen, while the field separator (typically comma or semicolon) is determined automatically by the underlying locale. A header line is added to show the field names.